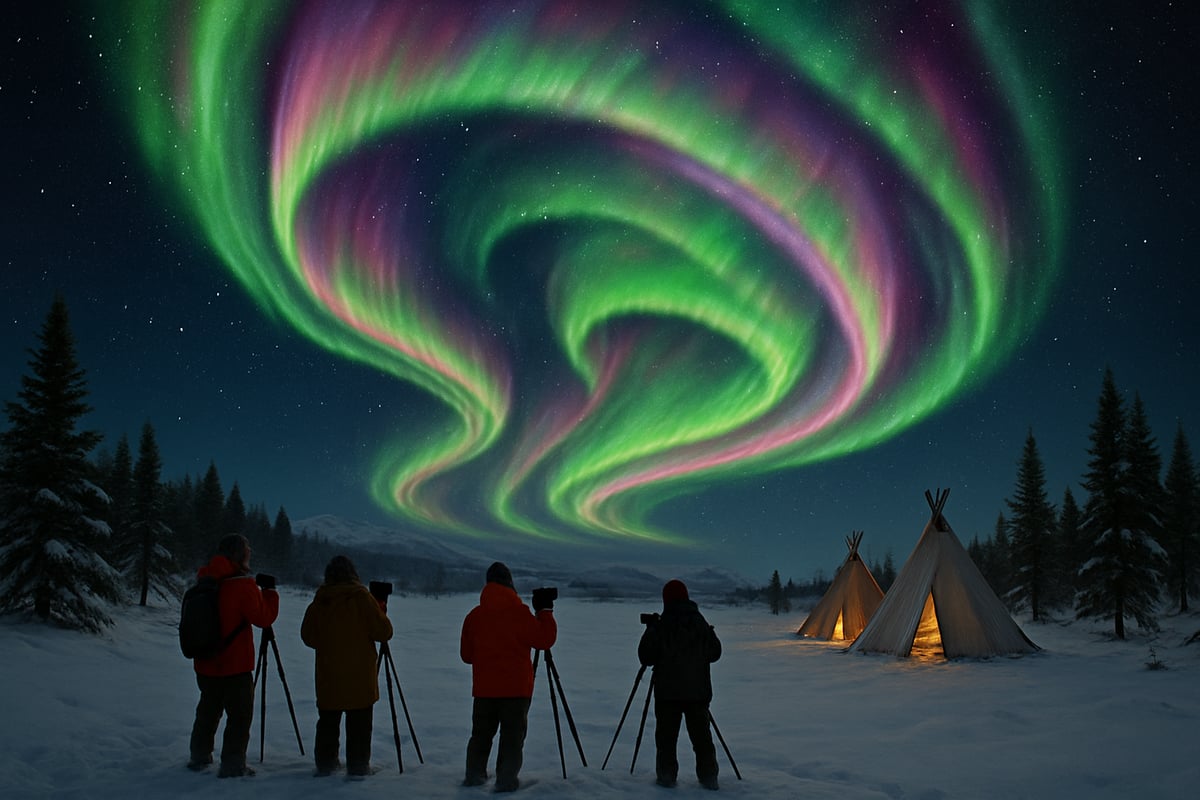
Imagine standing beneath a velvet-black sky as ribbons of green and purple light swirl overhead, painting the Arctic night in breathtaking color.
This is the promise of a northern lights photography tour in 2025—a chance to capture one of nature’s most mesmerizing displays with your own camera.
With aurora adventures growing in popularity, more travelers are chasing the perfect shot, but photographing the Northern Lights presents unique challenges even for experienced photographers.
In this guide, you’ll discover how to choose the best destination and timing, prepare your gear, master essential techniques, and enjoy every moment of your tour.
Ready to turn your dream into reality? Let’s plan your ultimate aurora adventure.
Understanding the Northern Lights: Science, Myths & Magic
What Are the Northern Lights?
The aurora borealis is one of nature’s most spectacular displays. This phenomenon is created when charged solar particles collide with gases in Earth’s atmosphere, igniting waves of color that dance across the polar skies.
You’ll often see vibrant greens, the most common hue, produced by oxygen molecules. Pinks, reds, and purples also appear, depending on altitude and which gases are struck. The aurora’s intensity rises and falls in cycles—solar maximum brings more frequent and vivid shows, while solar minimum means fewer displays.
Recent data from NASA highlights how places like Alaska have become prime spots for witnessing these cycles. If you’re joining a northern lights photography tour, understanding the science behind the aurora adds depth to every shot.
Myths, Legends, and Cultural Significance
For centuries, the northern lights have inspired awe and wonder. Indigenous Sami people in Scandinavia saw the aurora as the breath of ancient ancestors, while Inuit legends describe spirits playing ball with a walrus skull.
Scandinavian folklore often links the lights to omens or messages from the gods. The aurora has sparked the imagination of poets and explorers, fueling stories passed down through generations.
Participating in a northern lights photography tour is not just about the visuals—it’s about immersing yourself in a rich tapestry of culture and tradition. Local festivals and rituals celebrate the lights, making each encounter feel magical and meaningful.
Best Places on Earth to See the Northern Lights in 2025
Choosing the right destination is vital for your northern lights photography tour. In 2025, top spots include Finnish Lapland, Alaska (especially Fairbanks), Norway, Iceland, and Canada. Fairbanks, sitting beneath the aurora oval, enjoys an average of 243 aurora nights per year. Rovaniemi in Lapland boasts over 50 viewing locations and easy access.
Here’s a quick comparison of top destinations:
| Destination | Aurora Nights/Year | Unique Features |
|---|---|---|
| Fairbanks, Alaska | 243 | Aurora oval, clear skies |
| Rovaniemi, Lapland | 200+ | 50+ spots, local guides |
| Tromsø, Norway | 180+ | Coastal landscapes |
Local guides play a crucial role in maximizing your chances. For curated options, explore the Best Northern Lights Tour Packages to find experiences tailored for serious photographers.
When to Go: Timing Your 2025 Photography Tour
Timing is everything for a successful northern lights photography tour. The best season runs from September to April, when nights are darkest and the aurora is most active. Winter months offer the clearest skies, especially away from city lights.
Plan your adventure around the new moon for the deepest darkness and most vibrant colors. Many Alaska tours are scheduled to coincide with these optimal lunar phases, while Lapland’s peak season lasts from December through April.
Book your 2025 tour early to secure the best dates. Consider group size, guide expertise, and flexibility with weather for the most rewarding experience.
Preparing for Your Northern Lights Photography Tour
Getting ready for your northern lights photography tour is half the adventure. Preparation ensures you can focus on capturing the aurora’s magic rather than worrying about logistics or missing essential gear. Each step, from choosing a tour to packing your camera bag, plays a vital role in setting you up for success.
Choosing the Right Tour: What to Look For
Selecting the ideal northern lights photography tour can be overwhelming with so many options available. Decide between group tours, which offer camaraderie and lower costs, and private tours, which provide personalized attention and flexibility.
Expert photography guides are crucial—they not only know the best aurora spots but also help you master your camera settings in Arctic conditions. Look for tours that offer unlimited distance chases, small group sizes, and guarantees. For example, Book Lapland’s “No Limits” tours promise to go wherever necessary for the best chance at a sighting, while Beyond Arctic limits groups to just 8 people for optimal guidance.
Essential Camera Gear & Accessories
Bringing the right gear is essential for a successful northern lights photography tour. A DSLR or mirrorless camera with manual controls, a wide-angle lens (f/2.8 or faster), a sturdy tripod, and plenty of spare batteries are must-haves.
Phone cameras or compact models rarely produce quality aurora images due to sensor limitations. Some tours provide helpful extras like tripods and camera mounts. For a complete checklist of what to pack and wear, the Lapland Holidays Packing Checklist is a valuable resource to ensure you’re fully prepared for the Arctic night.
Clothing & Comfort in Arctic Conditions
Staying warm is just as important as bringing the right camera gear on your northern lights photography tour. Dress in layers: thermal base, insulating mid-layer, and a windproof outer shell. Insulated boots, thick socks, gloves, and a warm hat are essential for hours outside in subzero temperatures.
Many Lapland tours provide winter overalls, boots, and even heated vans to keep you comfortable. Hot drinks and snacks are common inclusions, making the experience cozy despite the cold. Hand warmers and moisture-wicking fabrics can be game changers for long nights under the aurora.
Booking Logistics: Pricing, Group Size, and Guarantees
When booking your northern lights photography tour, compare pricing, group sizes, and refund policies. For 2025, prices typically range from €145 to €350 per person, depending on tour length and inclusions. Smaller groups mean more personalized guidance and better chances to capture the aurora without crowding.
Many reputable companies, like Book Lapland, offer 100% money-back guarantees if the aurora isn’t visible, while others include all gear, snacks, and transfers in their price. Here’s a quick comparison:
| Feature | Basic Tour | Premium Tour |
|---|---|---|
| Price (per person) | €145–€200 | €250–€350 |
| Group Size | 12–16 | 4–8 |
| Gear Included | Limited | Full (tripod, boots) |
| Refund Guarantee | Sometimes | Yes (Book Lapland) |
Book Lapland: Authentic Aurora Photography Tours in Lapland
Book Lapland stands out for its expert-led northern lights photography tour experiences in Finnish Lapland. Their unlimited distance aurora hunts maximize your chances, while SkyView Igloos allow for unique viewing and shooting opportunities.
A 100% money-back guarantee gives peace of mind, and the team’s multilingual support and personalized service have earned them a 4.9/5 rating from 1,400+ reviews. Beyond photography, Book Lapland offers reindeer farm visits, husky adventures, and authentic cultural immersion, ensuring every moment of your 2025 trip is unforgettable.
Step-by-Step: The Northern Lights Photography Tour Experience
Standing beneath a sky ablaze with vibrant green and purple ribbons, your northern lights photography tour begins long before the first shutter click. Every moment, from the initial briefing to the final photo review, is thoughtfully crafted to maximize your chances of capturing the aurora’s elusive magic. Let’s walk through what you can expect on a well-organized northern lights photography tour, breaking down each step so you know exactly how your adventure will unfold.
Step 1: Pre-Tour Briefing & Aurora Forecasts
Your northern lights photography tour kicks off with a cozy team meeting indoors. Guides welcome you, introduce the night’s plan, and explain how local weather and aurora forecasts shape the evening’s route.
Using real-time data and specialized apps, guides break down the science behind aurora predictions. They share insights on solar activity, cloud cover, and the best spots to maximize your chances. This is your opportunity to ask questions, clarify expectations, and get last-minute tips. The goal is to ensure everyone feels prepared and excited for the adventure ahead, setting the tone for a memorable northern lights photography tour.
Step 2: Traveling to Prime Aurora Locations
Once everyone is briefed, you’ll head out using comfortable minivans, snowmobiles, or even on foot depending on terrain and conditions. Local expertise is key to a successful northern lights photography tour—guides often have dozens of secret spots mapped out, ready to pivot if weather changes.
Tours are flexible, sometimes traveling up to 100 km in search of clear skies. Escaping city lights is essential, so expect a journey into the Arctic wilderness. Along the way, guides share stories about the region, adding cultural flavor to your northern lights photography tour and building anticipation for the first glimpse of the aurora.
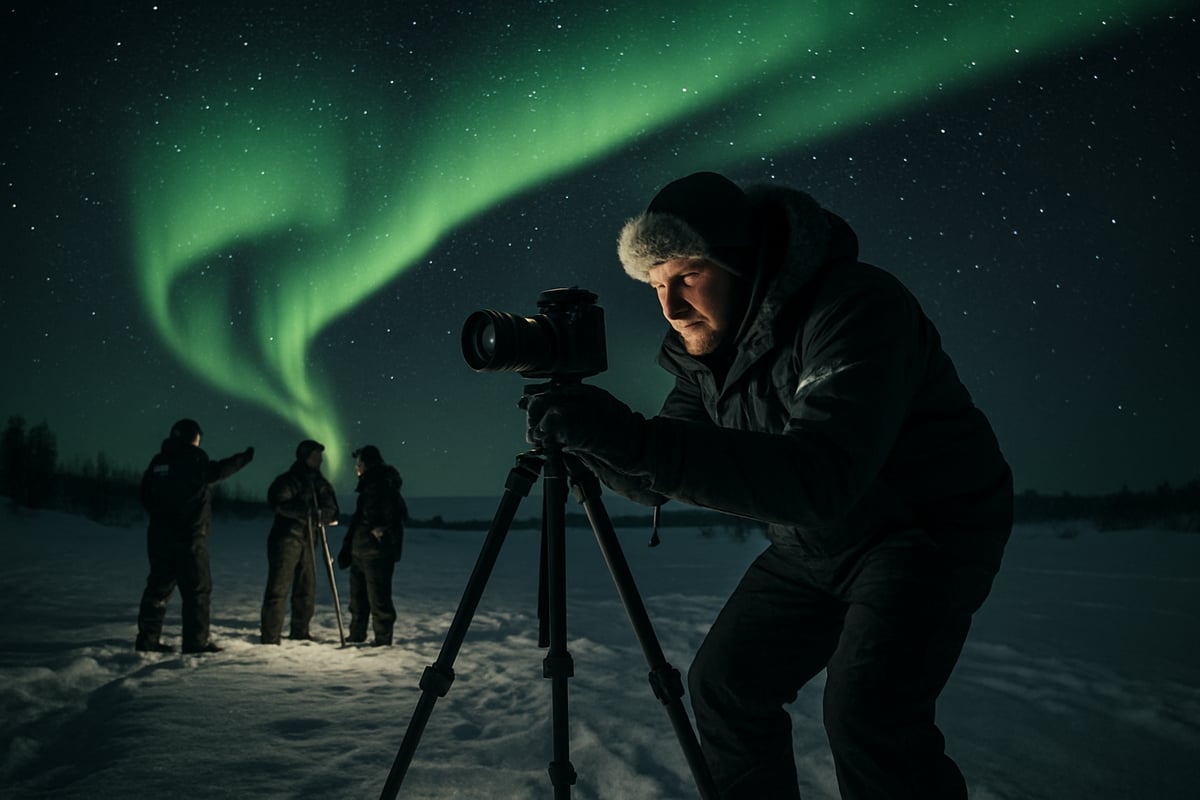
Step 3: Setting Up Your Gear in the Arctic Night
Arriving at a carefully chosen location, guides help you set up your camera gear quickly—gloves on, batteries warm, and tripods secure in the snow. On a northern lights photography tour, efficiency is vital, as auroras can appear and vanish without warning.
Headlamps (with red lights to preserve night vision) are distributed, and guides double-check everyone’s equipment. If you’re new to night photography, they’ll walk you through the basics, ensuring you’re ready to capture the spectacle. The focus is on comfort and readiness, helping you make the most of every moment on your northern lights photography tour.
Step 4: Mastering Night Photography Techniques
Guides now provide hands-on instruction in camera settings—manual mode, ISO, aperture, and shutter speed—all tailored for the northern lights photography tour environment. You’ll learn how to focus in the dark, use live view, and adjust white balance for true-to-life colors.
Practical demonstrations and one-on-one tips ensure everyone gets the most from their gear. For those craving more detail, the Comprehensive Aurora Photography Guide offers a deep dive into planning and technical strategies. This step is where your skills grow, making your northern lights photography tour both educational and exhilarating.
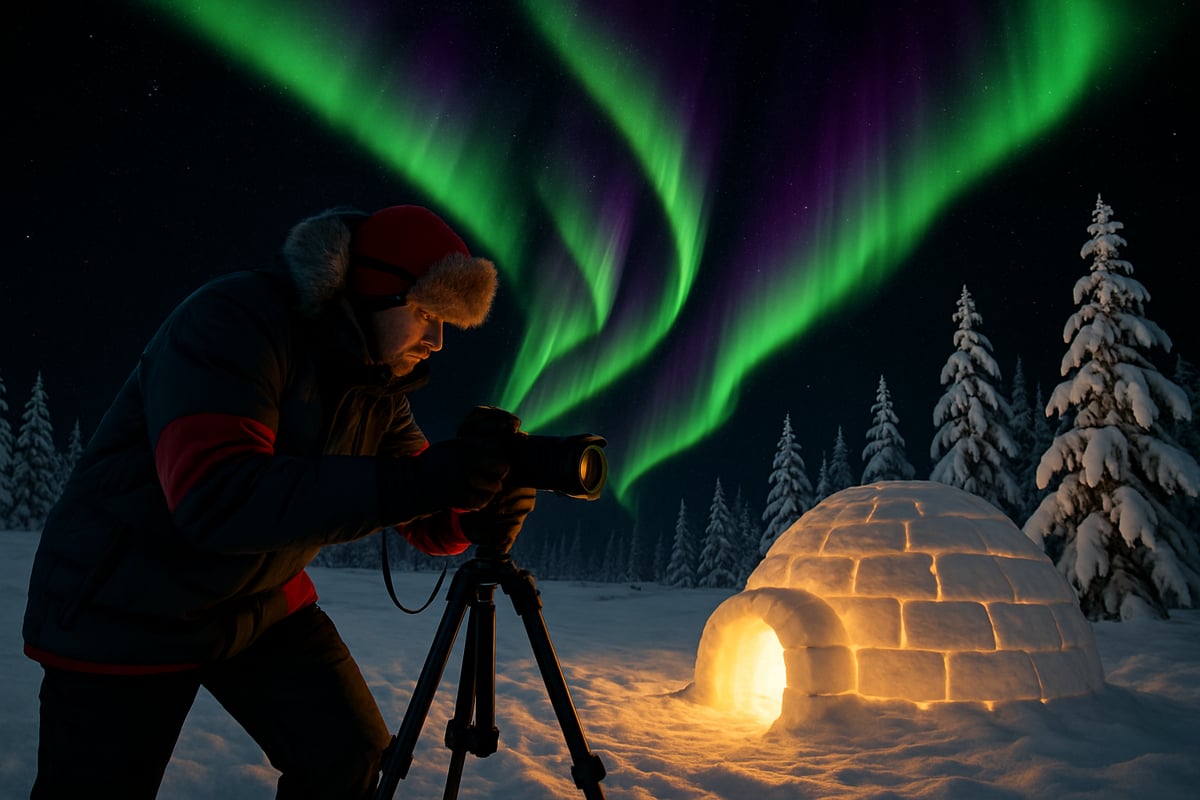
Step 5: Composing Magical Aurora Shots
With the aurora swirling above, guides encourage you to experiment with creative compositions. Trees, frozen lakes, mountains, and even igloos can add depth and scale to your northern lights photography tour images.
Tips include using reflections, silhouettes, and including people for a sense of wonder. The dynamic movement of the lights means no two shots are the same. Group and one-on-one guidance helps you find unique perspectives, ensuring your northern lights photography tour yields photos as memorable as the experience itself.
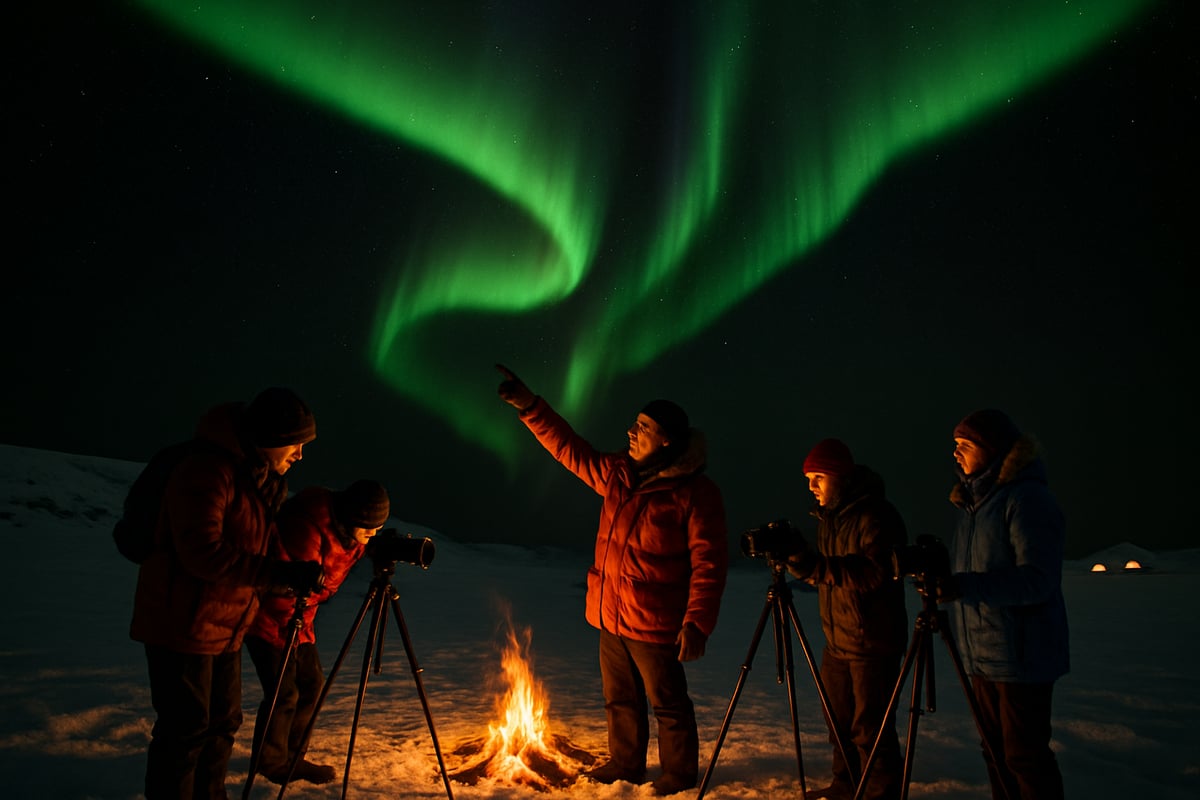
Step 6: Enjoying the Experience—Beyond the Camera
A northern lights photography tour isn’t just about photos. While cameras work, guides often build a campfire, serve hot drinks, and share local snacks. The warmth of the fire and camaraderie of the group create an unforgettable atmosphere.
Stories and laughter fill the air as you gaze upward, sometimes capturing the Milky Way or shooting stars if the aurora is faint. This step reminds you to savor the moment—your northern lights photography tour is as much about connection and awe as it is about technical achievement.
Step 7: Reviewing Images & Post-Tour Follow-Up
Back at base, guides review your images, offering feedback and editing tips. Some tours even provide professionally edited photos for download or access to online galleries. This collaborative review ensures you leave your northern lights photography tour with tangible memories and improved skills.
You’ll learn how to select, share, and preserve your best shots. Many guests print their favorite aurora images or create albums, extending the magic of the northern lights photography tour long after the trip ends.
Step 8: Dealing with Unpredictable Weather
The aurora’s appearance is never guaranteed. On nights when the lights don’t show, your northern lights photography tour pivots to alternative activities—night landscape photography, stargazing, or cultural experiences like storytelling.
Guides emphasize flexibility and positivity, making every night valuable. Some tours offer unlimited distance or extra time to chase clear skies, boosting your chances. No matter the outcome, a northern lights photography tour ensures adventure and discovery, with memories that last a lifetime.
Essential Northern Lights Photography Techniques & Tips
Photographing the aurora is both an art and a science. Whether you're an aspiring enthusiast or a seasoned traveler, mastering the right techniques on your northern lights photography tour makes all the difference. Here’s how to get the most magical results, even in the challenging Arctic night.
Camera Settings for Stunning Aurora Shots
Getting your camera settings right is the foundation of any successful northern lights photography tour. The aurora varies in brightness and movement, so flexibility is key.
- Start with manual mode for full control.
- Use a wide aperture (f/2.8–f/4) to let in as much light as possible.
- Set ISO between 800–3200, adjusting based on aurora strength and your camera’s noise performance.
- Opt for shutter speeds of 5–15 seconds. Shorter for fast-moving lights, longer for faint displays.
- Focus manually to infinity using live view; autofocus often fails in the dark.
For more in-depth advice, check out Nikon's Northern Lights Photography Tips, which is a great resource for refining your settings.
Always take test shots and tweak settings as the aurora shifts. This hands-on approach is what makes every northern lights photography tour unique.
Composition and Creativity in the Arctic
A great aurora photo isn’t just about the sky. On your northern lights photography tour, look for ways to anchor the lights with compelling foregrounds.
- Use trees, frozen lakes, mountains, or igloos for scale and interest.
- Try reflections in water or ice to double the drama.
- Compose with leading lines—like a snowy path or river—to guide the viewer’s eye toward the aurora.
- Experiment with silhouettes of people or structures for storytelling.
For more ideas on composing aurora images, see CaptureLandscapes' Aurora Composition Techniques.
Let creativity lead you. Each night on a northern lights photography tour presents fresh opportunities to frame the magic.
Overcoming Common Challenges
Arctic conditions bring unique hurdles, especially during a northern lights photography tour. Preparation and quick thinking are essential.
- Cold drains batteries fast—keep spares in an inner pocket.
- Lens fog and frost can ruin shots; use lens hoods and anti-fog wipes.
- Wind shakes tripods, so weigh yours down or shield it.
- Snow can reflect unwanted light; adjust your angle or use a lens hood.
If the weather turns, don’t hesitate to adapt. Sometimes, the best memories from a northern lights photography tour come from overcoming these obstacles together.
Shooting with Different Cameras: DSLR, Mirrorless & Phones
The camera you bring on your northern lights photography tour shapes your results. Here’s a quick comparison:
| Camera Type | Pros | Cons |
|---|---|---|
| DSLR/Mirrorless | Best quality, full control | Heavier, more setup required |
| Compact/Point & Shoot | Portable, easy to use | Limited manual settings, small sensor |
| Smartphone | Always with you, easy sharing | Struggles in low light, noisy images |
DSLRs and mirrorless cameras are preferred for their control and image quality. If using a phone, try manual camera apps and a tripod mount. Many tours offer mounts, but a dedicated camera still provides the best experience on a northern lights photography tour.
Post-Processing: Bringing Out the Magic
Editing is the final step in bringing your aurora images to life after your northern lights photography tour. Shoot RAW files for maximum flexibility.
- Use software like Lightroom or Photoshop.
- Adjust white balance to capture natural aurora colors.
- Apply noise reduction, especially at high ISO.
- Boost contrast and clarity to make the lights pop.
Many tours offer post-processing tips or workshops. With the right edits, your northern lights photography tour memories will truly shine.
Safety & Etiquette During Night Tours
Safety and respect go hand-in-hand on every northern lights photography tour. Arctic nights can be harsh, and group dynamics matter.
- Dress warmly and keep essentials handy.
- Stay aware of your surroundings to avoid slips or getting lost.
- Respect other photographers’ space—avoid shining headlamps or stepping into shots.
- Follow leave-no-trace principles to protect fragile Arctic environments.
Small group sizes enhance both safety and enjoyment. Remember, a successful northern lights photography tour is about both unforgettable images and shared experiences.
Planning Your 2025 Northern Lights Adventure
Embarking on a northern lights photography tour in 2025 is an adventure that requires thoughtful planning. With solar activity peaking and demand for aurora experiences on the rise, preparing well ensures you capture every magical moment. Let’s break down the essentials for planning your unforgettable journey.
How to Choose the Perfect Tour for Your Needs
Selecting the right northern lights photography tour is the first step to a successful adventure. Consider your experience level—are you a beginner or seasoned photographer? Smaller groups mean more personalized guidance, while private tours offer exclusivity.
Think about tour duration, included amenities, and the credentials of your guides. Reading reviews and comparing options helps you find the best fit. For a deeper dive into the pros and cons, check out this guide on Guided Northern Lights Packages vs DIY trips.
A well-chosen tour maximizes your chances of success and enjoyment.
Booking Early: Securing Your Spot for Peak Season
With 2025 expected to bring strong aurora displays, demand for northern lights photography tour spots is high. Booking 6–12 months ahead is wise, especially for peak months like December to March.
Many operators in Alaska and Lapland report sold-out tours during these periods. If Rovaniemi is on your radar, learn about the upcoming season’s best dates and viewing opportunities on the Northern Lights in Rovaniemi 2025–2026 page.
Early booking ensures you don’t miss out on your preferred dates and accommodations.
Accommodation Options: From Igloos to Wilderness Cabins
Where you stay can elevate your northern lights photography tour experience. Glass igloos offer the chance to watch the aurora from the warmth of your bed, while cozy cabins and boutique hotels provide comfort after long nights outdoors.
Some tours partner with wilderness lodges for secluded, light-pollution-free views. Consider amenities like private hot tubs or on-site viewing decks. SkyView Igloos, for example, are a favorite for photographers seeking unique compositions and comfort.
Choose accommodation that matches your style and enhances your adventure.
Budgeting for Your Trip: Costs & Value
Understanding the costs of a northern lights photography tour helps you plan wisely. Here’s a quick comparison:
| Option | Price Range | Inclusions |
|---|---|---|
| Group Tour | €145–€250 | Guide, transport, snacks |
| Private Tour | €350+ | Personalized itinerary, gear |
| Accommodation (Night) | €100–€450 | Igloo, cabin, hotel |
| Gear Rental | €20–€50 | Tripod, camera mount |
Premium tours often include all gear, meals, and transfers, while budget options may offer à la carte add-ons. Factor in extras like clothing rental or cultural experiences for a full picture.
Making the Most of Your Arctic Experience
Your northern lights photography tour can be much more than just chasing the aurora. Add on husky sledding, reindeer farm visits, or snowmobiling for a rounded Arctic adventure.
Engage with local culture—try traditional foods, learn about Sami heritage, or join a campfire storytelling session. Extending your stay gives you more chances for clear skies and lasting memories.
Embrace every moment, and your 2025 journey will be unforgettable.
If you’re dreaming of standing under the swirling colors of the aurora and capturing that once-in-a-lifetime shot, now’s the perfect time to start planning your 2025 adventure. We’ve covered everything you need to know—from picking the right gear to finding the best locations and getting those creative shots. But nothing compares to joining a passionate local guide who knows exactly where and when the magic happens. Ready to turn your Northern Lights photography dreams into reality? Take the next step and explore your options for unforgettable Northern Lights Tours in Lapland.